THREAD GRAFFITI
  • Home
  • Long Arm Quilting Service
  • Shopping
  • YouTube
  • Blog
  • T-Shirt Quilts
  • Personalized Teddy Bears
  • Photo Gallery
  • Contact Us

Jolly bar 3 Quilt Along

5/17/2021

1 Comment

 
Picture
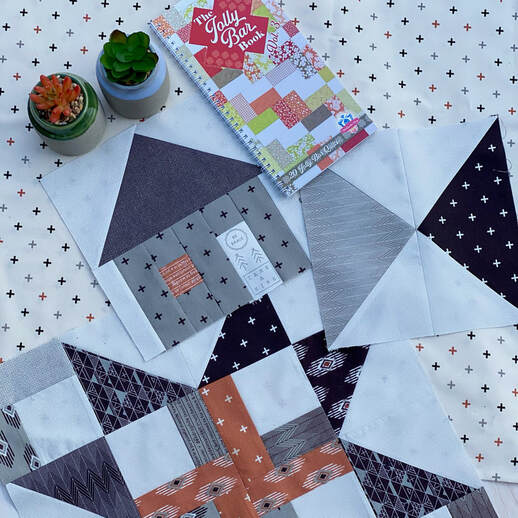
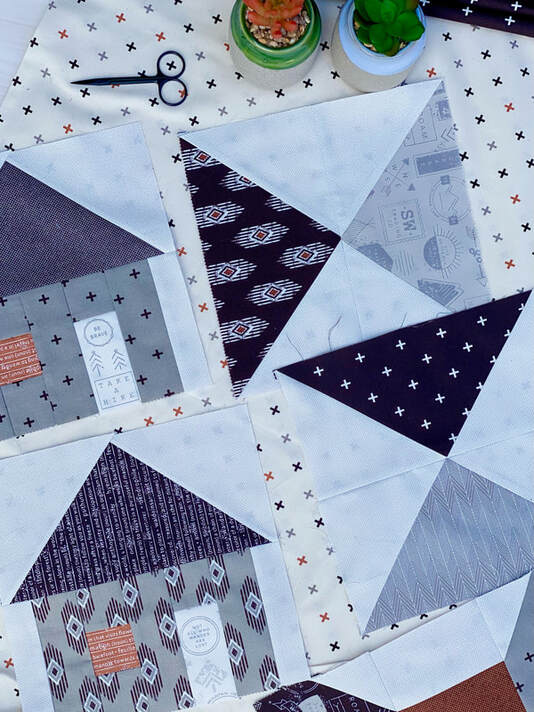
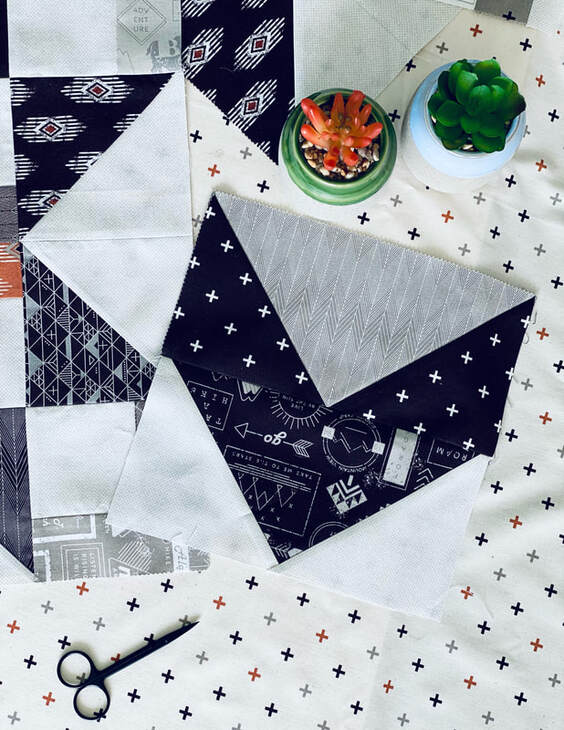
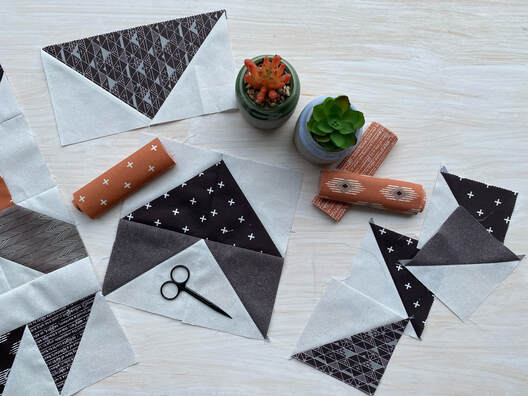
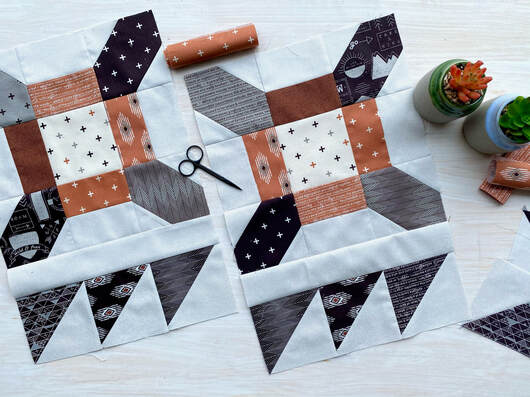
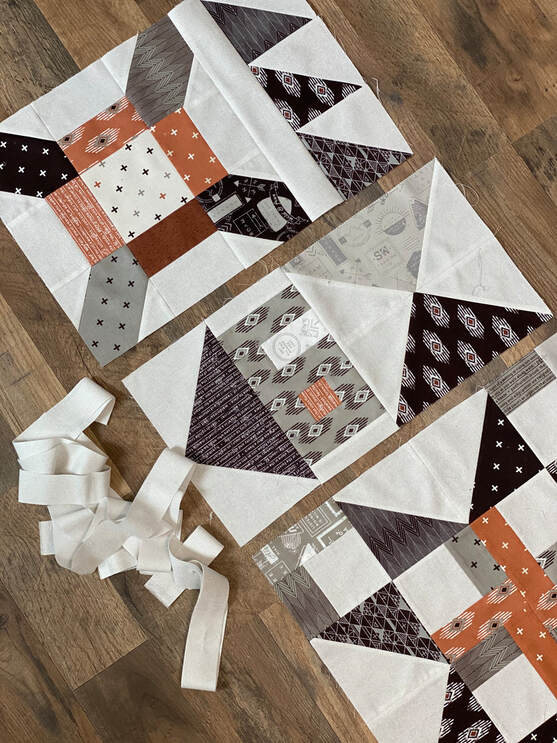
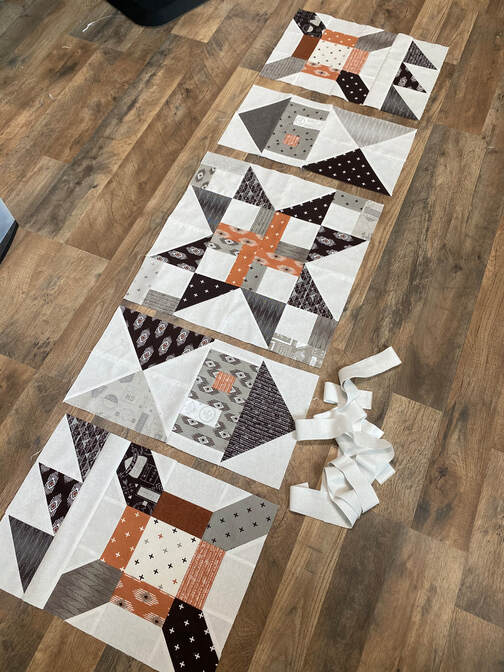
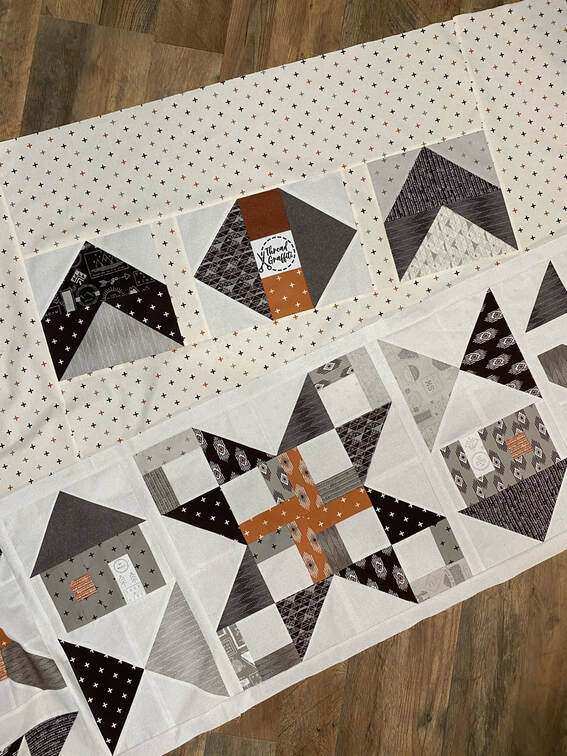
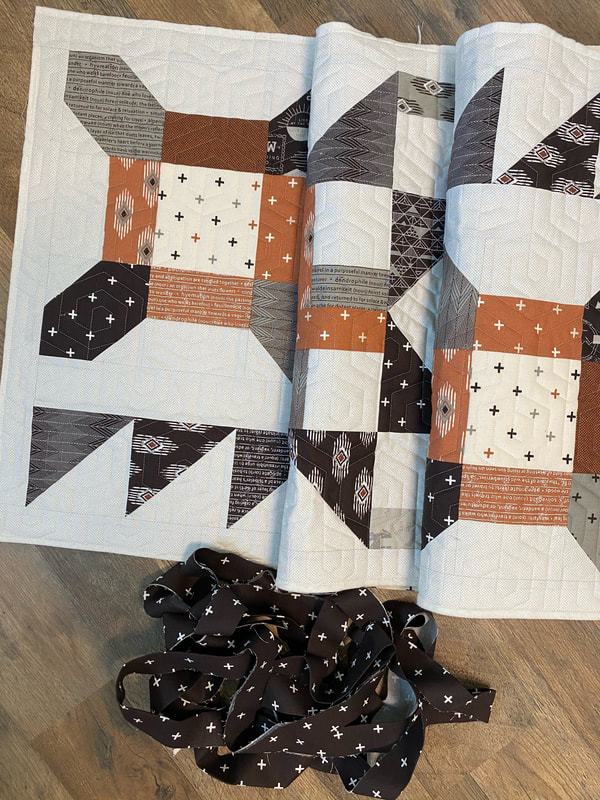
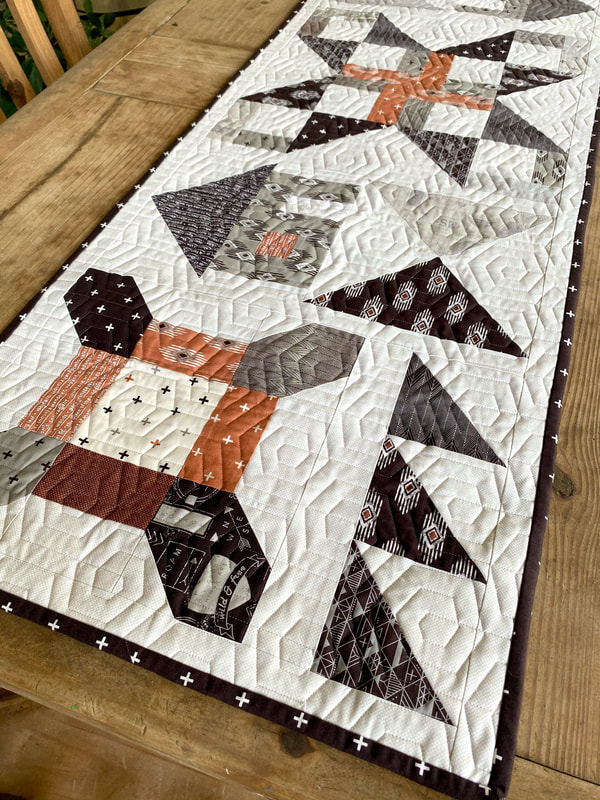
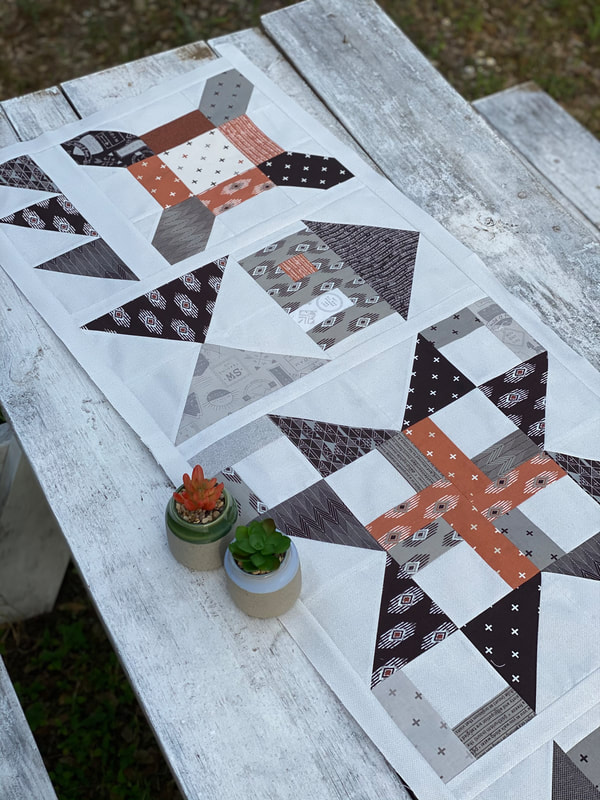
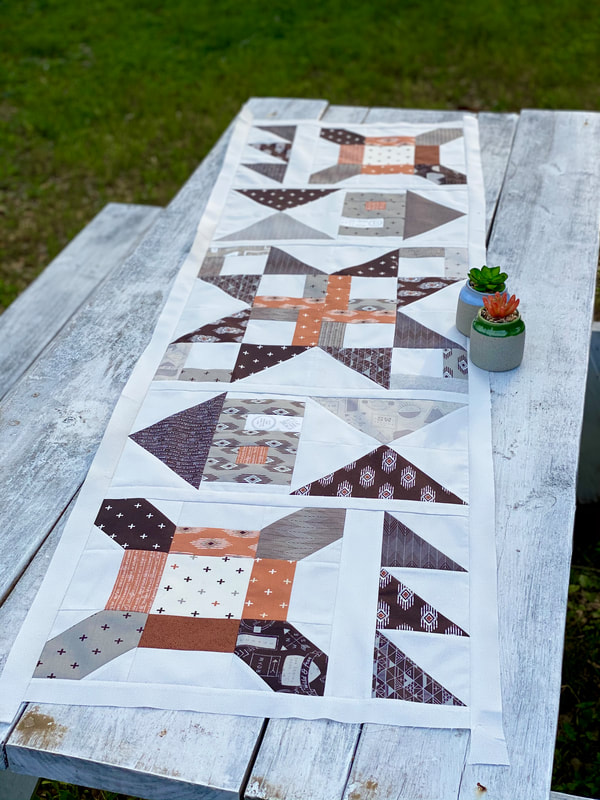
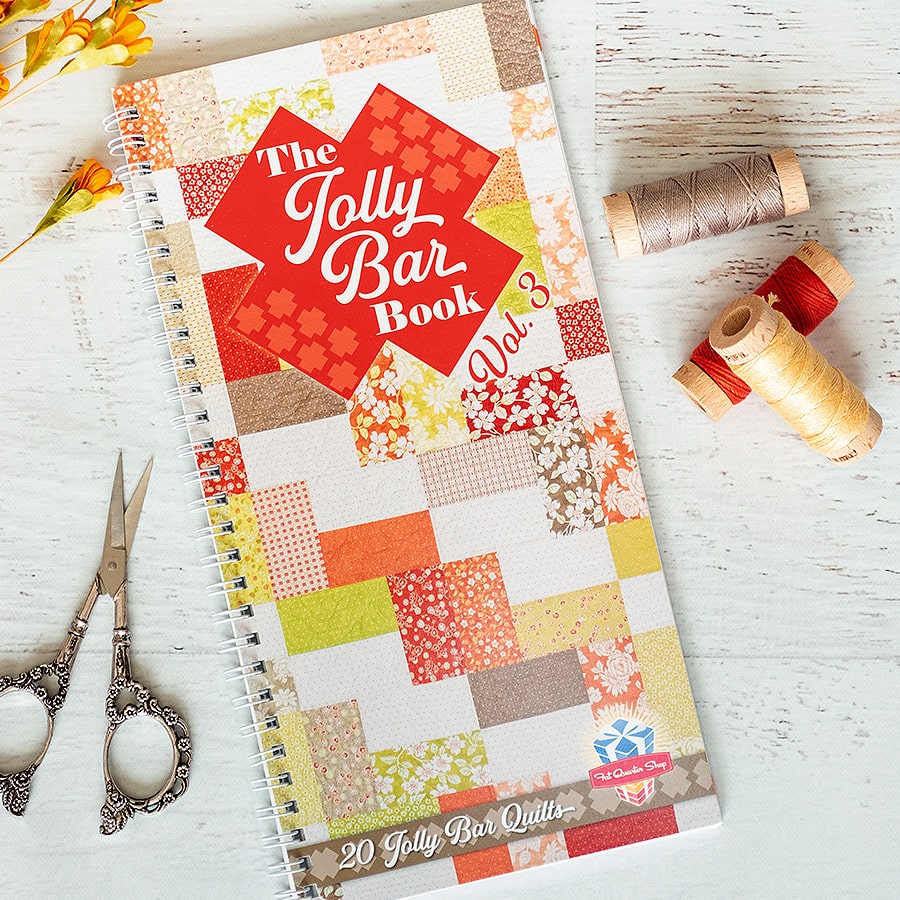
 Who's loving this quilt along sew far?  I love Jolly Bars, they are 5x10 precuts, and they make great fast quilts!  This is the 3rd Jolly Bar Book to come out, and I have made several things from each of them, they are a must have for your library!  To celebrate the Jolly Bar Book Volume 3, Fat Quarter Shop is hosting the Jolly Bar 3 Quilt Along, that means we all get to make an adorable table runner together! All you need is the new Jolly Bar Book series – Volume 3 a Jolly Bar and some background fabric, the fabric requirements and all the details are below.  The Jolly Bar Book Volume 3 includes 20 quilt patterns designed just for our exclusive 5″ x 10″ Jolly Bar precuts,

Starting Monday, April 5, 2021, we’ll be sewing a different block each week for eight weeks. The piece we’re making uses a sampling of blocks from the book, and all together they make an exquisite tablerunner that measures 22.5″ x 80.5″.  
** I added some alternate options below because I wanted my runner a little smaller.**


Fabric Requirements
  • One Jolly Bar 
  • 1 ⅞ yards for Background, Sashing & Borders 
  • Fat Quarter Accent Fabric (Paradox Blocks) 
  • ⅝ yard for Binding 
  • 2 ¼ yards for Pieced Backing 
  • Jolly Bar 3 Book 
DOWNLOAD A PDF OF FABRIC REQUIREMENTS​
Fat Quarter Shop Quilting Fabrics and Supplies
Picture
Picture
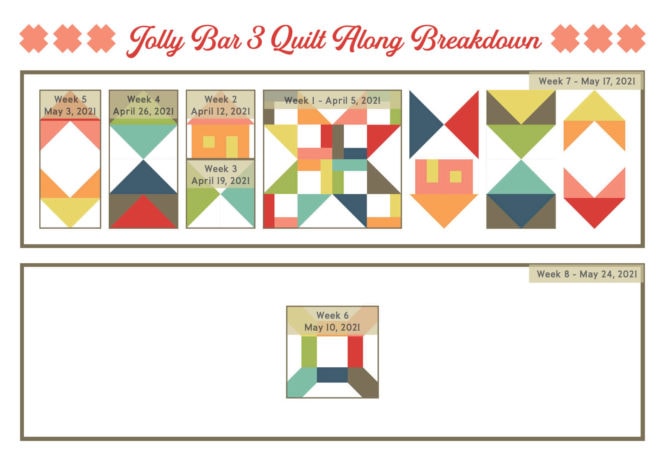
I decided that since I love all things rusty orange, blacks and greys that I would use Smoke & Rusty by Lella Boutique, it has a fun modern fell, and it will match my house great!  
I added an alternate pattern option to the bottom (keep scrolling down) since I wanted my runner to be a little shorter. Check out what I did a little different, and feel free to ask questions if you have them.  My runner came out 22x65, here is a sneak peek...
Picture
Picture
Picture

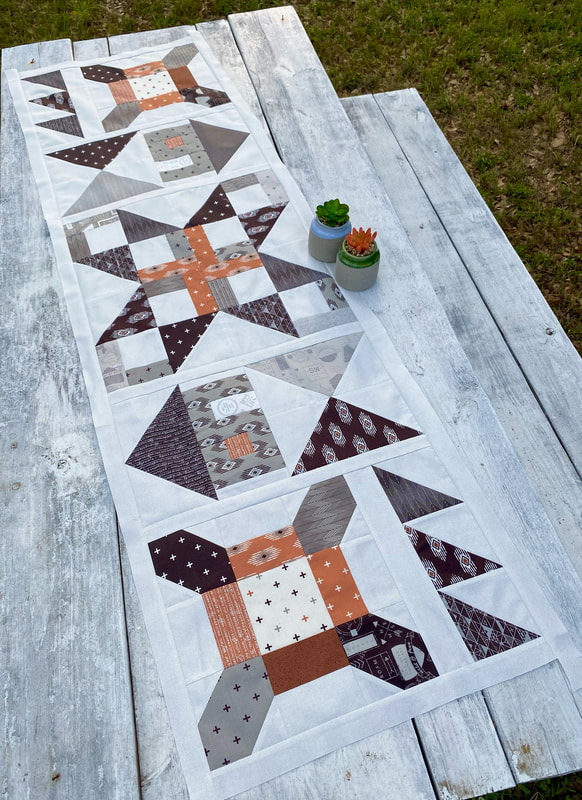
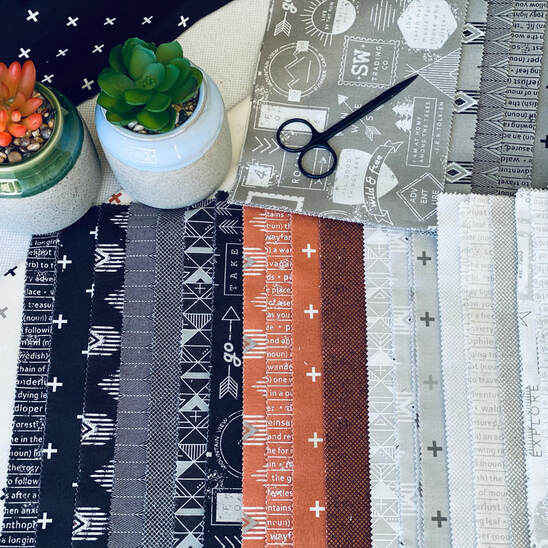
Week 1 - April 5th  *Treasure Trove Block
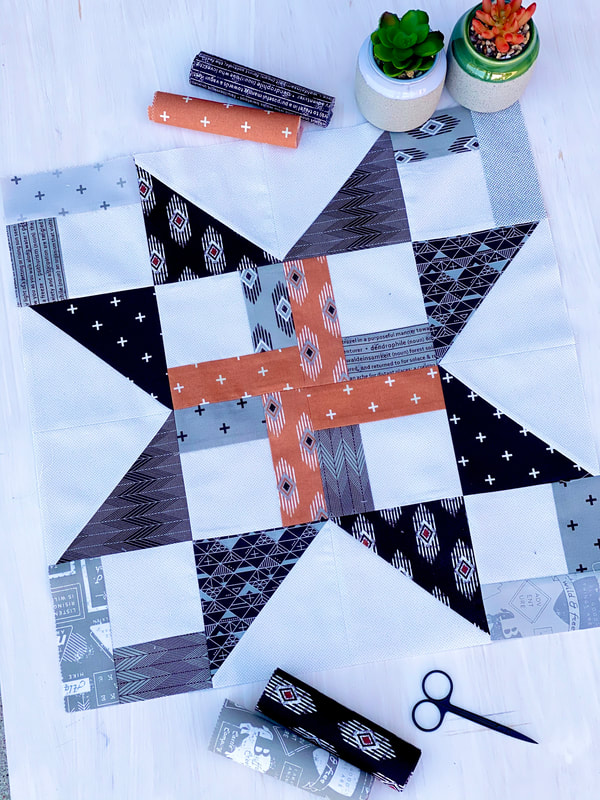
Download Block 1 Instructions HERE
Picture

Week 2 - April 12th  *Homecoming Blocks 

Download Block 2 Instructions HERE

Picture
Picture

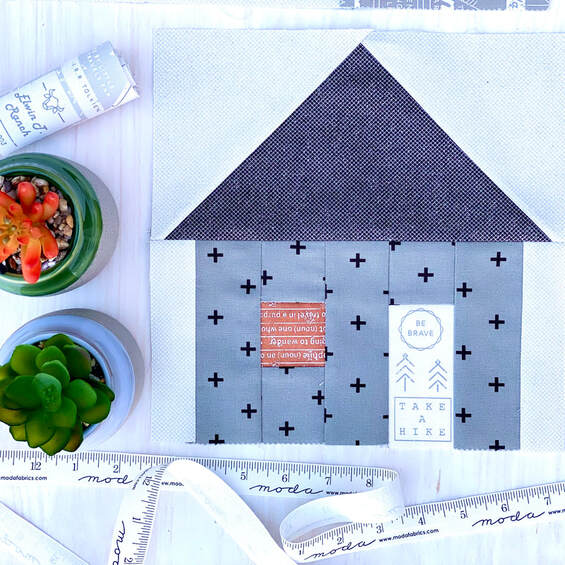
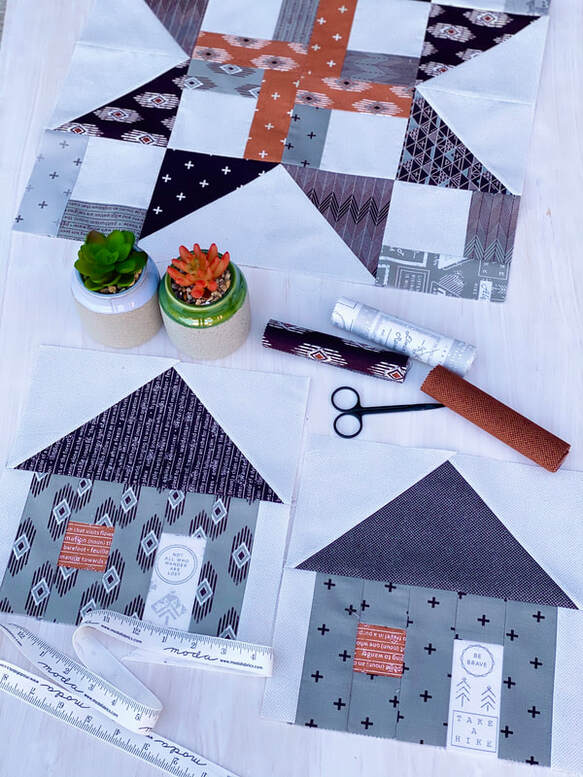
Week 3 - April 19th *Springtime Bliss Blocks
​(I'm using on the back)

Download Block 3 Instructions HERE

Picture
Picture

Week 4 - April 26th *Paradox Block (I'm using on the back) 

Download Block 4 Instructions HERE

Picture

Week 5 - May 3rd *Westward Blocks (I'm using on the back)

Download block 5 Instructions HERE

Picture

Week 6 - May 10th *Friendship Bracelet Block
​(I'm making 2 and using them on the front)

Download Block 6 Instructions HERE

I'm making two blocks to go on the front instead of the backing, I wanted my runner shorter so this seemed like a better option for me. See below for alternate cutting options. 
Picture

Week 7 - May 17th *Tablerunner sashing & borders

​Since I made my runner shorter (22x65) I decided to make my sashing pieces 1.5" and I really liked the finished size.  

Download Block 7 Instructions HERE

Picture
Picture
Picture

Week 8 - May 24th  *Tablerunner Backing, Quilting, & Binding 

Download Backing Instructions HERE

Since I made my table runner different, the size for my backing will be shorter, but you can still used the above layout, you just wont need as much fabric on the right and left side of the center block. I explained down below how I figured my backing in the alternate pattern section. 
​ I upload my logo to Spoonflower, put the image on repeat until I get the desired size and have it printed on white cotton fabric, then I cut them and use them as labels in my quilts.  ​
Picture
Picture
Picture
Picture
Picture
DOWNLOAD PDF BLOCK PATTERNS HERE 

Alternate Size Options: 

When I started this sew along I wasn't sure if I was going to want the table runner to be as long as the original pattern suggested, so I made some changes to make mine a little shorter.  
Here are the changes I made... 
First, I decided that I really liked the block that was featured on the backing because the Smoke and Rust fabric collection only had a few pieces of the rusty orange in the bundle, and I wanted to use them on the front.  So instead of making week 4 block (Paradox) and week 5 block (Westward) on the front, I decided I would make two of the week 6 blocks (Friendship Bracelet) block instead.  But since they are only 12.5" blocks I needed something added to them to make them fit, so I added 6 HST and a sashing strip.  
*Tip: So depending on the cutting of some patterns, there are often a lot of corner pieces that are cut off and not used after the trimming, so I made a little video and took a few pictures to give a little mini tutorial to show you how I better use that leftover.  
So now that you have my HST tip, you can use it on future projects.  I almost always do this when I have the opportunity, and then I can trim them down to the size I want and use them on the backing or make matching pillows, y'all know I love pillows!  *In the video I sorta stumbled as I mentioned the cutting part, you will only cut once, right down the middle between the two lines, pictures shown below...
If you want to use my alternate pattern, you'll need to add:
6 - 4.5" HST (half square triangles)
2 - 2.5" x 12.5" sashing pieces (sew between the block and the HST)
I used 1.5" strips for sashing and borders pieces (A-D-C in week 7 instructions)
Backing: Because I made my table runner a little shorter, my backing was made using 3 blocks in the center and then filling in around that. I simply laid my table runner top on the floor, and figured that I would need 8.5" on top and bottom of my blocks to get enough extra to load to the long arm.  I then placed that piece center on the runner top, and measured out to the left and right to figure how much I would need to either side. All pieced backings will be a little different, the best way I have found is to lay my top down and figure things from the center and measure my way out. 
Binding: I usually use 2.5" strips for my binding, then I machine stitch it to the top with the sewing machine, press flat, then fold over the back side, hold with wonder clips and hand stitch it down using matching Aurifil 50 thread and Lori Holt Binding needles.   
Picture
Picture
Picture
My alternate option comes out to be 65" long, rather than the original 80".
OH, and if you look at the picture above, I alway leave the little tails on the border strip, then I trim them down so they are perfectly square after I take it off the long arm.  I dont do this on quilts, but I always do on smaller pieces that are going on tables, I want them to look perfect up close on a table.  
Picture

And just to make things a little more fun, I will share with you some of my behind the seams pictures of the quilts that I got to load to my the long arm for the book.  I was lucky enough to quilt the quilts featured on the book covers and inside the book too!  
I have some quilty friends sewing along with me, you should follow along for lots of inspiration, since we will all be using different fabrics. 
Visit the Fat Quarter Shop blog for lots of links for all the bloggers sewing along too!
​  ​
Gina Tell (@gina_tell_threadgraffiti), Thread Graffiti
Jen Belnap (@thesmittenchicken),  The Smitten Chicken
Jeresther Thorpe-Page (@Sew_SweetSeeBee)
Lisa Johnson (@intheboondocks), In the Boondocks
Mona Phelps (@mona.phelps), Bluegrass Stitches
Pat Sloan (@quilterpatsloan), Pat Sloan
Patty (@elmstreetquilts), Elm Street Quilts
Sondra Davison (@sondradavison), Out of the Blue Quilts

​Please follow along on Facebook and Instagram for updates, and be sure to hashtag your progress with #JollyBar3QAL on Instagram and Facebook so we can see and share your work!

Until next time, Happy Quilting!!!
​Gina
1 Comment
    Picture
    ​

    Author

    ​Hey Y'all, I'm Gina Tell! I live on Lake Travis just North of Austin Texas.  I'm a full time long arm quilter and lover of all this art and outdoors!! 

    Fat Quarter Shop Quilting Fabrics and Supplies

    Archives

    February 2023
    January 2023
    October 2022
    July 2022
    May 2022
    April 2022
    February 2022
    January 2022
    December 2021
    November 2021
    October 2021
    June 2021
    May 2021
    April 2021
    January 2021
    October 2020
    August 2020
    March 2020
    February 2020
    January 2020
    October 2019
    July 2019
    May 2019
    March 2019
    February 2019
    December 2018
    November 2018
    October 2018
    September 2018
    August 2018
    July 2018
    June 2018
    May 2018
    April 2018
    March 2018
    February 2018
    January 2018
    November 2017
    October 2017
    July 2017
    March 2017

My content may contain affiliate links for the products I use and love.
​ If you make a purchase after clicking one of these links, I'll earn some extra sewing money, at no additional cost to you.
​
Thank you SEW much, Happy Quilting!!!!
  • Home
  • Long Arm Quilting Service
  • Shopping
  • YouTube
  • Blog
  • T-Shirt Quilts
  • Personalized Teddy Bears
  • Photo Gallery
  • Contact Us